
A safari photography checklist is the single most important preparation tool you can build before heading into the African bush. The right gear, settings, and accessories determine whether you come home with frame-worthy wildlife images or a memory card full of blurry misses. Conditions in places like Hluhluwe-iMfolozi Park and iSimangaliso Wetland Park push every piece of equipment to its limit. Dust, intense heat, sudden light changes, and limited power access are not edge cases. They are the daily reality. A complete safari checklist covers camera bodies, lenses, power supplies, clothing, and shooting technique so nothing gets left to chance.
1. Which camera gear is essential for a successful wildlife safari
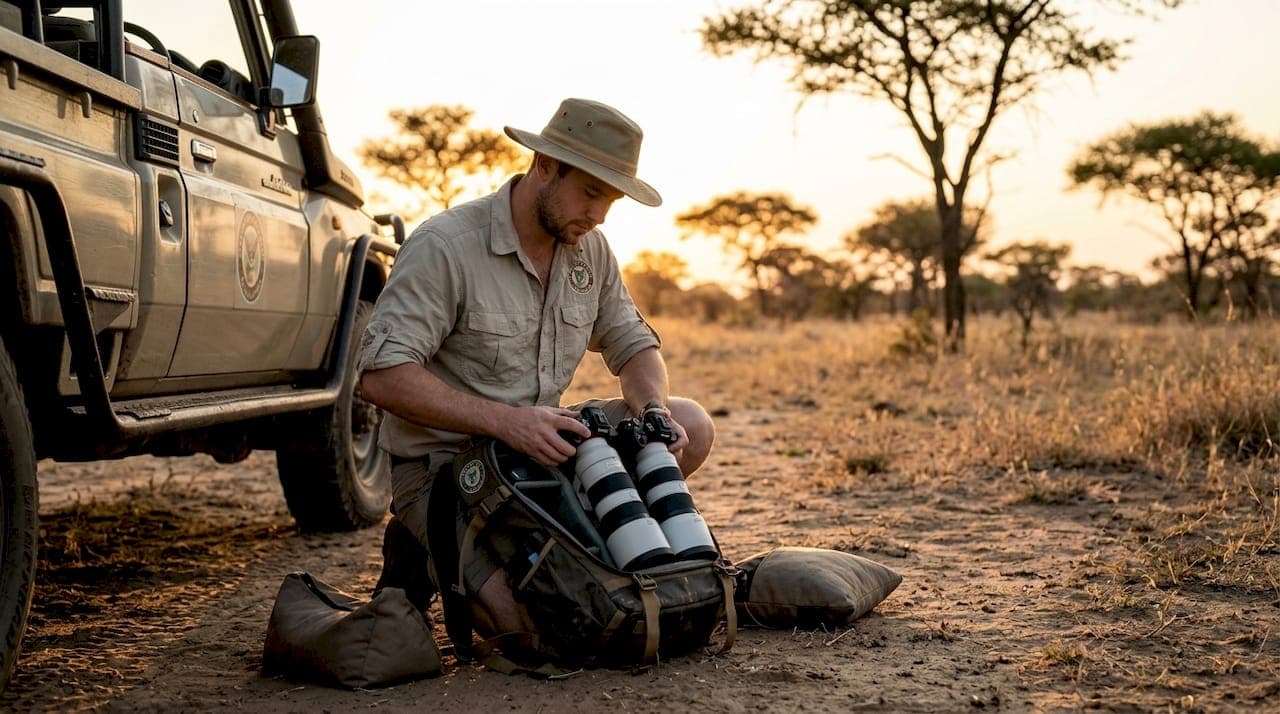
Two camera bodies are the foundation of any serious wildlife photography kit. Two bodies with complementary lenses let you keep a telephoto on one and a mid-range on the other, so you never miss a shot fumbling with a lens change. That setup also gives you a working backup if one body fails in the field, which happens more often than photographers expect.
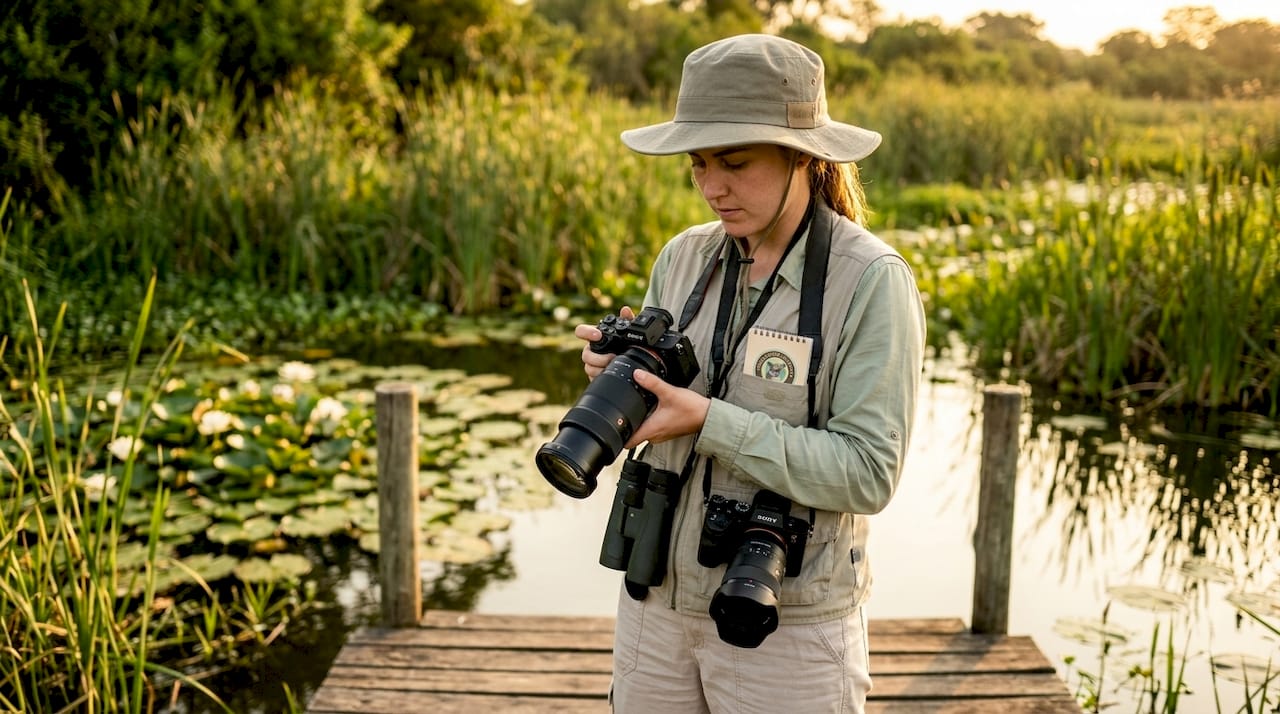
For lenses, the range matters enormously. Telephoto zooms covering 100–400mm or 200–600mm are the primary workhorses for wildlife at distance. A 70–200mm lens fills the gap for closer subjects, environmental portraits, and vehicle-side encounters with animals like elephant or giraffe. Teleconverters (1.4x or 2x) extend your reach without adding a full lens to your bag, which is worth considering for birds and shy species.
Wide-angle lenses (16–35mm or 24–70mm) round out the kit for landscape context shots and dramatic foreground compositions at waterholes. They are not the priority, but they earn their weight on a longer trip.
- Two camera bodies (primary + backup)
- Telephoto zoom: 100–400mm or 200–600mm
- Mid-range zoom: 70–200mm
- Teleconverter: 1.4x or 2x
- Wide-angle zoom: 16–35mm or 24–70mm
- Dust protection covers and rain sleeves for each body
- Sensor cleaning kit (blower, sensor swabs, microfiber cloths, lens pen)
Pro Tip: Pack a beanbag instead of a tripod. Beanbags outperform tripods on open safari vehicles because they drape over the door frame and absorb engine vibration. Tripods are impractical in tight vehicle spaces and slow you down when an animal appears without warning.
2. How to manage power, storage, and data backup on safari
Heat drains lithium batteries faster than most photographers expect. Experts recommend 4–6 fully charged batteries per camera body as the baseline for a full day in the African sun. Running out of power during a leopard sighting is a mistake you only make once.
Memory cards need the same level of planning. Shooting in RAW format at burst speeds generates enormous file sizes. Carrying at least 3–4 memory cards of 128GB or more per body gives you room to shoot freely without rationing frames. High-speed cards (V60 or V90 rated) prevent buffer slowdowns during burst sequences.
Data backup is the step most photographers skip until they lose images. Nightly backups to portable SSDs or a laptop protect against card failure, which is a real risk on extended trips far from any replacement source. Back up to two separate devices every night without exception.
- 4–6 batteries per camera body (fully charged before each drive)
- Battery charger with international adapter
- 3–4 memory cards per body (128GB+, V60 or V90 rated)
- Portable SSD (minimum 1TB) for nightly image backup
- Laptop or tablet as a second backup device
- Portable power bank (10,000mAh minimum) for charging in the field
Pro Tip: Pack a multi-port power strip for your lodge room. Most safari accommodations have limited outlets, and charging two bodies, a power bank, and a laptop simultaneously requires planning ahead.
3. What clothing and personal gear enhances your safari experience
Neutral-colored clothing is not a style choice. It is a practical decision that keeps you from startling wildlife and blending into the vehicle. Khaki, olive, tan, and gray tones work well. Avoid white, black, and bright colors, which stand out against the bush and can attract insects.
Layering is the key to comfort on early morning drives. Temperatures in KwaZulu-Natal can drop sharply before sunrise and climb steeply by midmorning. A lightweight fleece or softshell jacket over a long-sleeve shirt handles that range without bulk. Warm socks and closed-toe shoes protect your feet during any walking sections.
- Neutral-colored shirts and pants (khaki, olive, tan, gray)
- Lightweight fleece or softshell jacket for cold mornings
- Wide-brim hat for sun protection during midday drives
- Polarized sunglasses to reduce glare and eye fatigue
- Closed-toe hiking shoes with good grip
- Warm socks for early morning drives
- High-SPF sunscreen (reapply every two hours)
- Insect repellent with DEET for malaria-risk areas
- Antimalarial medication (consult your doctor before travel)
- Lip balm with SPF
- Headlamp with spare batteries for pre-dawn departures
- Small notebook to record sightings, settings, and animal behavior
The notebook earns its place beyond journaling. Writing down the settings you used for a successful shot, or the behavior that preceded a charge or a kill, builds a personal field guide that improves every future safari.
4. Which camera settings maximize your chances of great wildlife photos
Camera settings for safari photography follow a clear hierarchy. Shutter speed controls everything. A minimum of 1/1000s for moving wildlife keeps subjects sharp. Fast action, like a cheetah at full sprint or a bird taking flight, demands 1/2000s or faster. Set this first before adjusting anything else.
Aperture serves two purposes depending on the light. An aperture between f/5.6 and f/8 delivers maximum sharpness across the frame during bright conditions. Drop to f/2.8 or f/4 in low light for a faster shutter speed and a softer background that separates the subject from the bush. Auto ISO with a ceiling of 3200 handles the exposure balance automatically, which frees you to focus on the animal rather than the meter.
"Light quality and timing are the most crucial variables on safari. Shooting during golden hours dramatically improves image quality and captures animals at their most active. The first hour after sunrise and the last hour before sunset deliver warm, directional light that no midday sun can match."
The shooting technique that separates good images from great ones is anticipation. Observing animal behavior directly rather than watching only through the viewfinder helps you read what is about to happen. A lion flicking its tail, a bird spreading its wings, or an elephant raising its trunk are all signals. Recognize them and you press the shutter before the moment, not after it.
- Set shutter speed first: 1/1000s minimum, 1/2000s for fast action
- Choose aperture: f/5.6–f/8 for sharpness, f/2.8–f/4 for low light
- Enable Auto ISO with a ceiling of 3200
- Switch to continuous autofocus (AI Servo on Canon, AF-C on Nikon and Sony)
- Use burst mode for action sequences and unpredictable movement
- Shoot during golden hour light for the best color and animal activity
- Watch the animal, not just the viewfinder, to anticipate the decisive moment
Check your bush safari settings before your first drive and confirm they match the conditions you expect.
5. How to protect and maintain your gear in dusty safari conditions
Dust is the biggest hidden threat to photographic gear on safari. Dust is the most significant danger to sensors and lens elements, and it accumulates fast on open vehicles moving through dry bush. A cleaning kit is not optional. It is as essential as the camera itself.
The two-body system directly reduces dust risk. Carrying two bodies with complementary lenses means fewer lens changes in the field, which means fewer opportunities for dust to enter the sensor chamber. Every lens swap is a risk. Minimize them.
- Sensor cleaning kit: rocket blower, sensor swabs, microfiber cloths, lens pen
- Full camera covers or rain sleeves for each body
- Zip-lock bags as emergency dust and moisture barriers
- Lens caps on all lenses not in active use
- Dedicated camera bag with dust-resistant lining
- Silica gel packets inside the bag to control moisture
Pro Tip: Clean your sensor every evening at the lodge, not just when you notice spots. Dust that sits on a sensor overnight can bond to the surface and become much harder to remove. A quick blower pass takes 30 seconds and saves hours of spot-removal in post-processing.
Carry your camera bag inside the vehicle rather than in the open storage area when driving on dirt roads. The difference in dust exposure between those two positions is significant.
Key takeaways
The most effective safari photography checklist for wildlife combines two camera bodies with telephoto lenses, 4–6 batteries per body, 128GB-plus memory cards, and a nightly backup routine to protect every image you capture.
| Point | Details |
|---|---|
| Two camera bodies | Carry a primary and backup body to avoid lens changes and protect sensors from dust. |
| Telephoto lens range | Use 100–400mm or 200–600mm as your primary wildlife lens for distance shots. |
| Power and storage | Pack 4–6 batteries per body and 3–4 memory cards of 128GB or more for full-day shooting. |
| Nightly data backup | Back up images to two separate devices every evening to prevent loss on extended trips. |
| Golden hour timing | Shoot during the first and last hour of daylight for the best light and most active wildlife. |
What I've learned from years of watching photographers on safari
The photographers who come home with the best images are rarely the ones with the most gear. They are the ones who prepared the right gear and then forgot about it. When your kit is sorted before you leave, you stop thinking about equipment and start thinking about animals.
The single mistake I see most often is over-packing lenses and under-packing batteries. A photographer with six lenses and two batteries will run out of power before lunch on a full-day drive. A photographer with two lenses and six batteries will shoot all day without interruption. Prioritize power over variety every time.
Beanbags are another thing people resist until they try them. I have watched photographers struggle with tripods on open vehicles, losing shots while the legs slip or the head wobbles from engine vibration. A beanbag costs almost nothing, weighs almost nothing, and outperforms a tripod in every vehicle-based situation.
The advice I give every photographer before their first wildlife safari is this: spend one evening reading about the behavior of the animals you most want to photograph. Know what a lion looks like when it is about to yawn. Know how a fish eagle behaves before it dives. That knowledge is worth more than any lens upgrade. Understanding what to expect on safari before you arrive changes how you see everything once you are there.
Preparation is not just about what fits in your bag. It is about arriving calm, confident, and ready to be patient. The bush rewards patience more than any other quality.
— Larni
Photography-ready safaris with Bushbaby Safaris Zululand
Bushbaby Safaris Zululand runs open vehicle safaris into Hluhluwe-iMfolozi Park and iSimangaliso Wetland Park, South Africa's first UNESCO World Heritage Site, from accommodations across St Lucia and Hluhluwe. Open vehicles give you unobstructed sightlines and the freedom to position your camera without a roof or window in the way.
Morning drives depart at golden hour, putting you in the park when the light is warm and the Big 5 are most active. Expert guides know these parks like the back of their hands and position the vehicle for the best photographic angles. Browse standard safari packages for half-day and full-day options, or check out the explorer safari packages for extended time in the field with more wildlife encounters and more frames worth keeping.
FAQ
What lenses should I bring on a wildlife safari?
Bring a telephoto zoom covering 100–400mm or 200–600mm as your primary lens and a 70–200mm for closer subjects. A teleconverter extends your reach without adding significant weight.
How many batteries do I need for a full day safari?
Pack 4–6 fully charged batteries per camera body. Heat drains lithium batteries faster than normal conditions, and a full-day drive can easily exhaust two or three batteries before you return to the lodge.
What are the best camera settings for moving wildlife?
Set your shutter speed to a minimum of 1/1000s for moving animals and 1/2000s for fast action. Use continuous autofocus, burst mode, and Auto ISO capped at 3200 to handle changing light automatically.
Do I need a tripod on safari?
A beanbag is more practical than a tripod on open safari vehicles. Beanbags absorb engine vibration, drape over door frames for stable support, and take up almost no space in your bag.
When is the best time to photograph wildlife on safari?
The first hour after sunrise and the last hour before sunset offer the best light and the most active animal behavior. Plan your drives around these golden hour windows for the strongest images.